

Bottle recognition
Python and C++ projects.
To realize my bottle recycling robot project, I had to find a way to recognize bottles. This article will show how I installed a camera on the robot and the solutions I found to do visual recognition using: ImageAI lib, OpenCV and a Haar Cascade. Finally, how to convert the position of the bottles in pixels of the image into a real 3D position to guide the robot towards its goals.
Table of contents
- Summary
- Camera setup on the robot
- ImageAI lib
- Setting up environment
- How to train a model
- Run the trained model on a picture
- Real time recognition through a camera
- How to optimize the detection process
- Real time detection on video
- OpenCV
- Haar Cascade
- How to get the position of the bottle?
- Results
1- Summary
I first tried the Python ImageAI library, unfortunately it was too slow to run on my robot’s Raspberry PI board. Then I moved on to an OpenCV script that uses the bottle reflection property, this worked well but it was difficult to find the position of the bottle and make sure the reflection was coming from a bottle. I finally made a Haar Cascade model that ran very quickly. With this last technique, I was able to determine the position of each bottle I detected with few false positives.
2- Camera setup on the robot
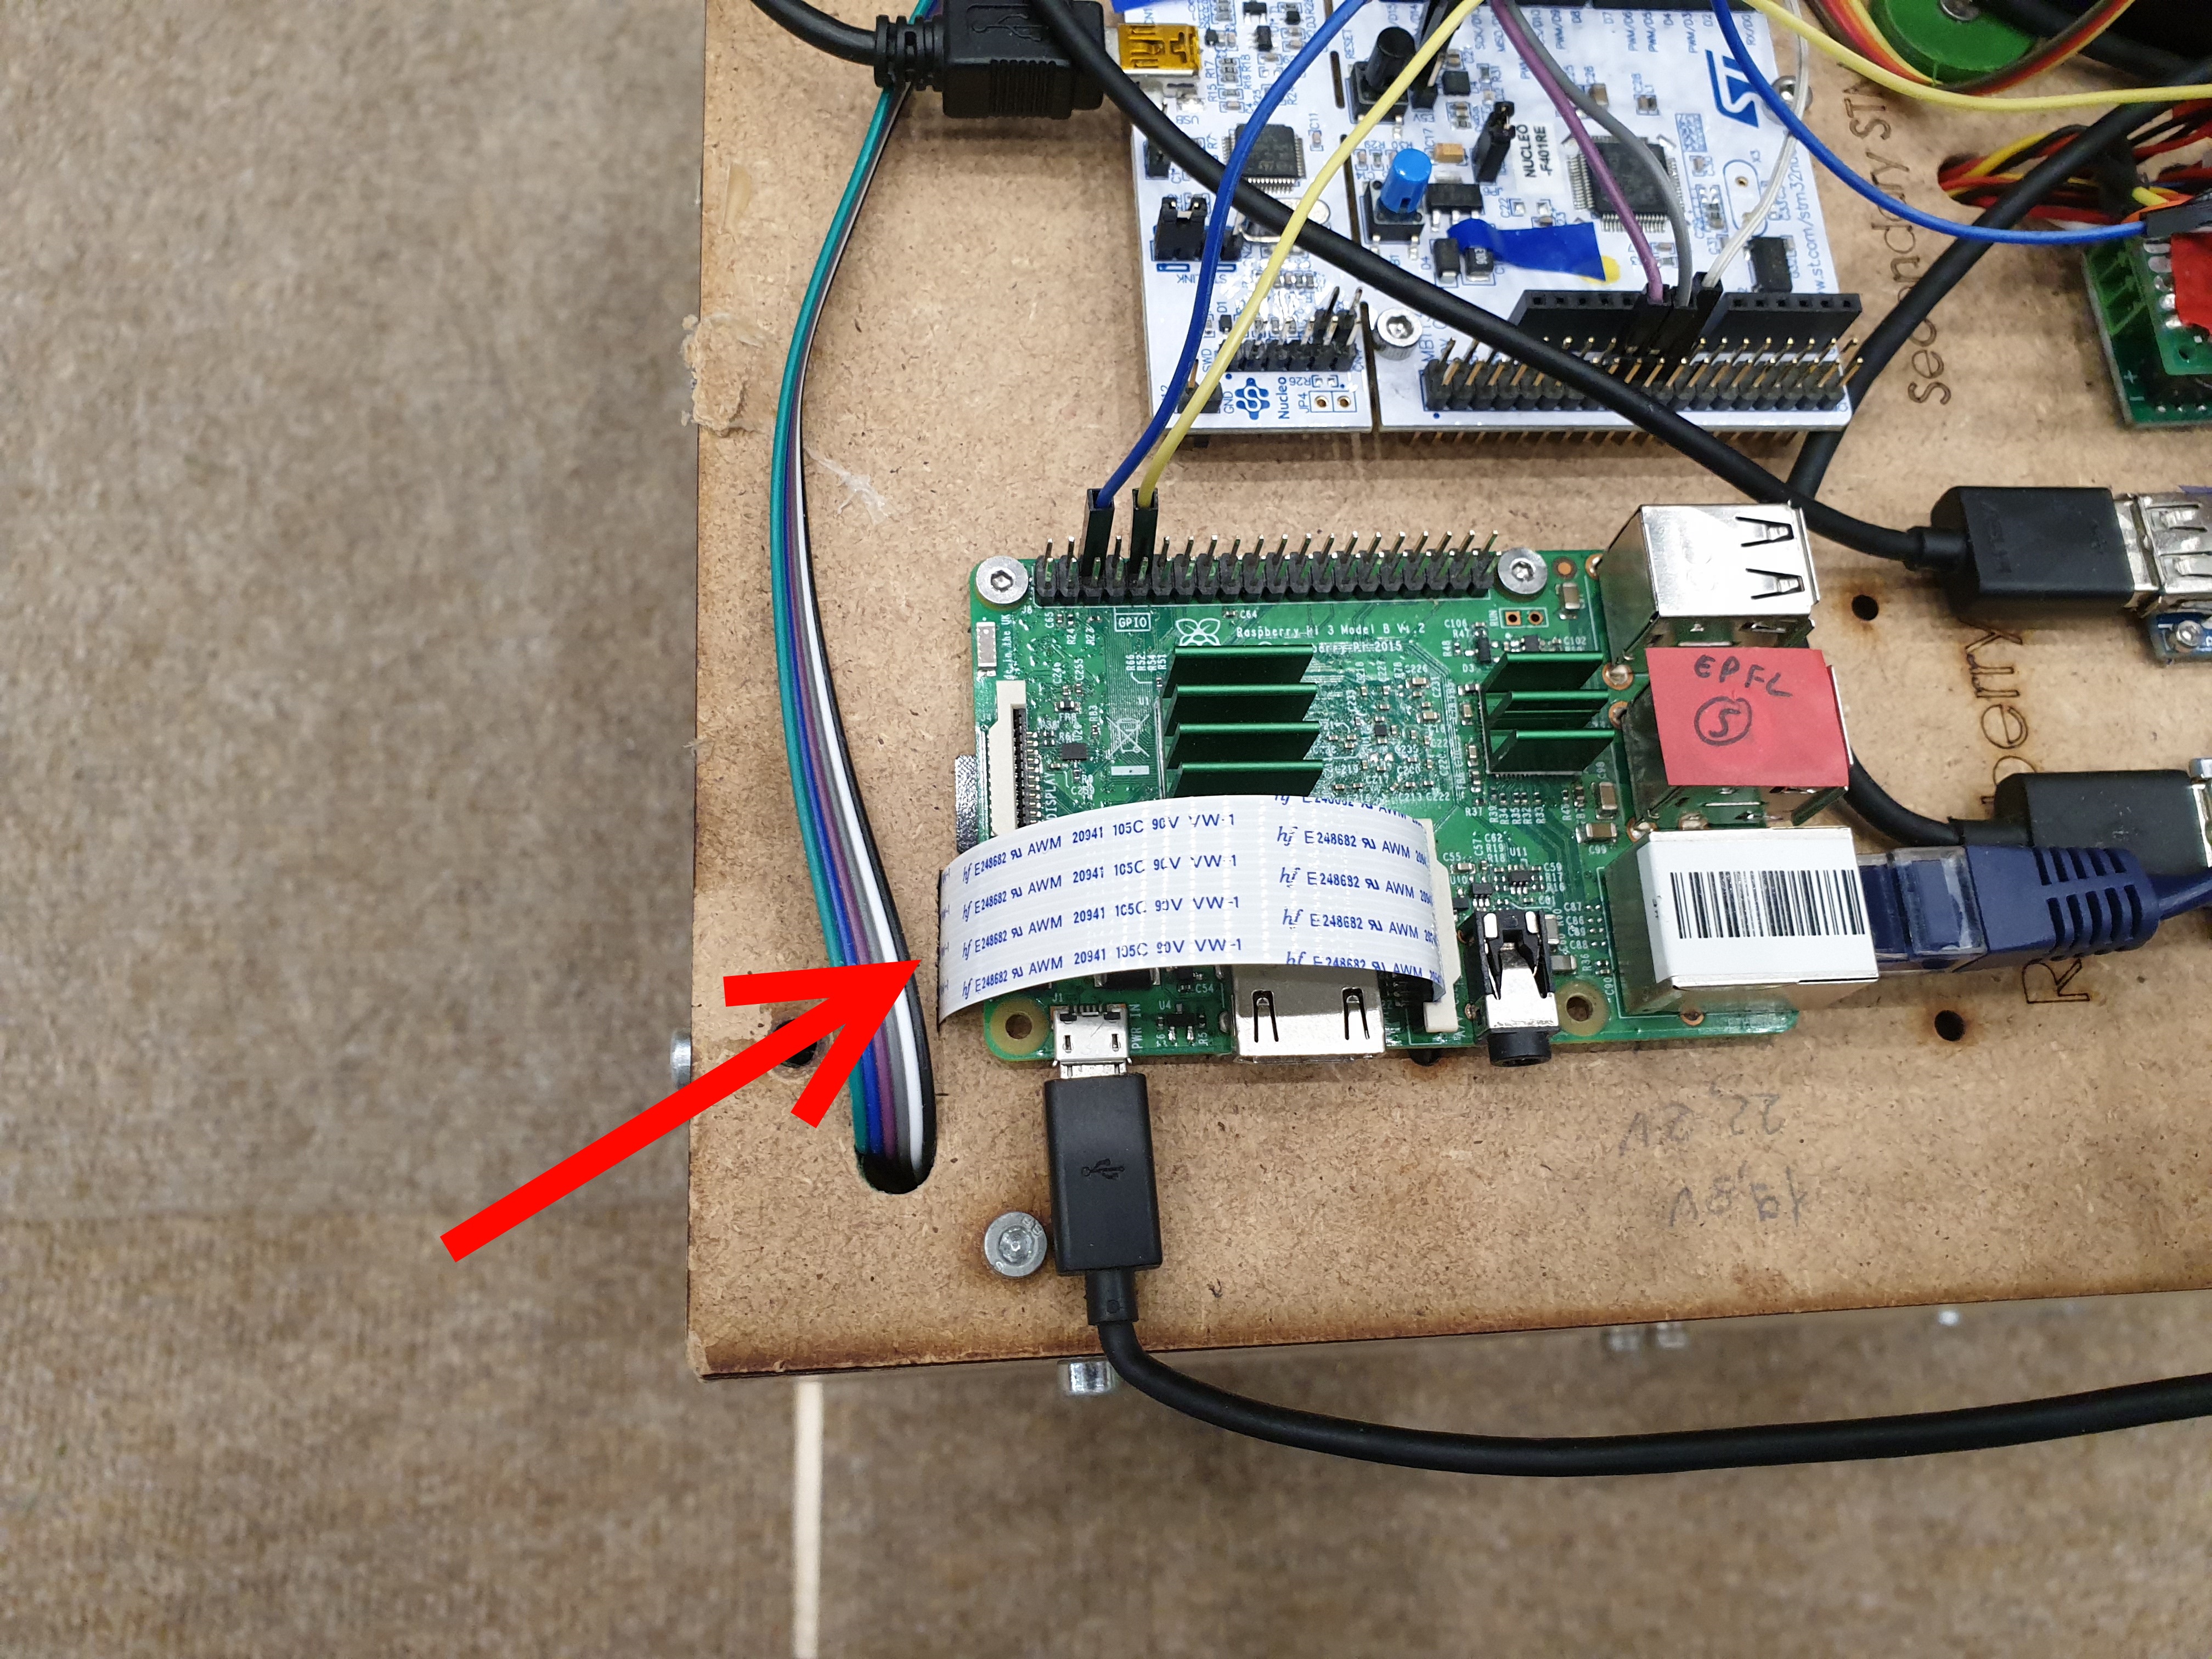
I first made a cut to put the camera inside the robot for aesthetic reasons. The cable to connect the Raspberry PI board to the camera is the white strip:
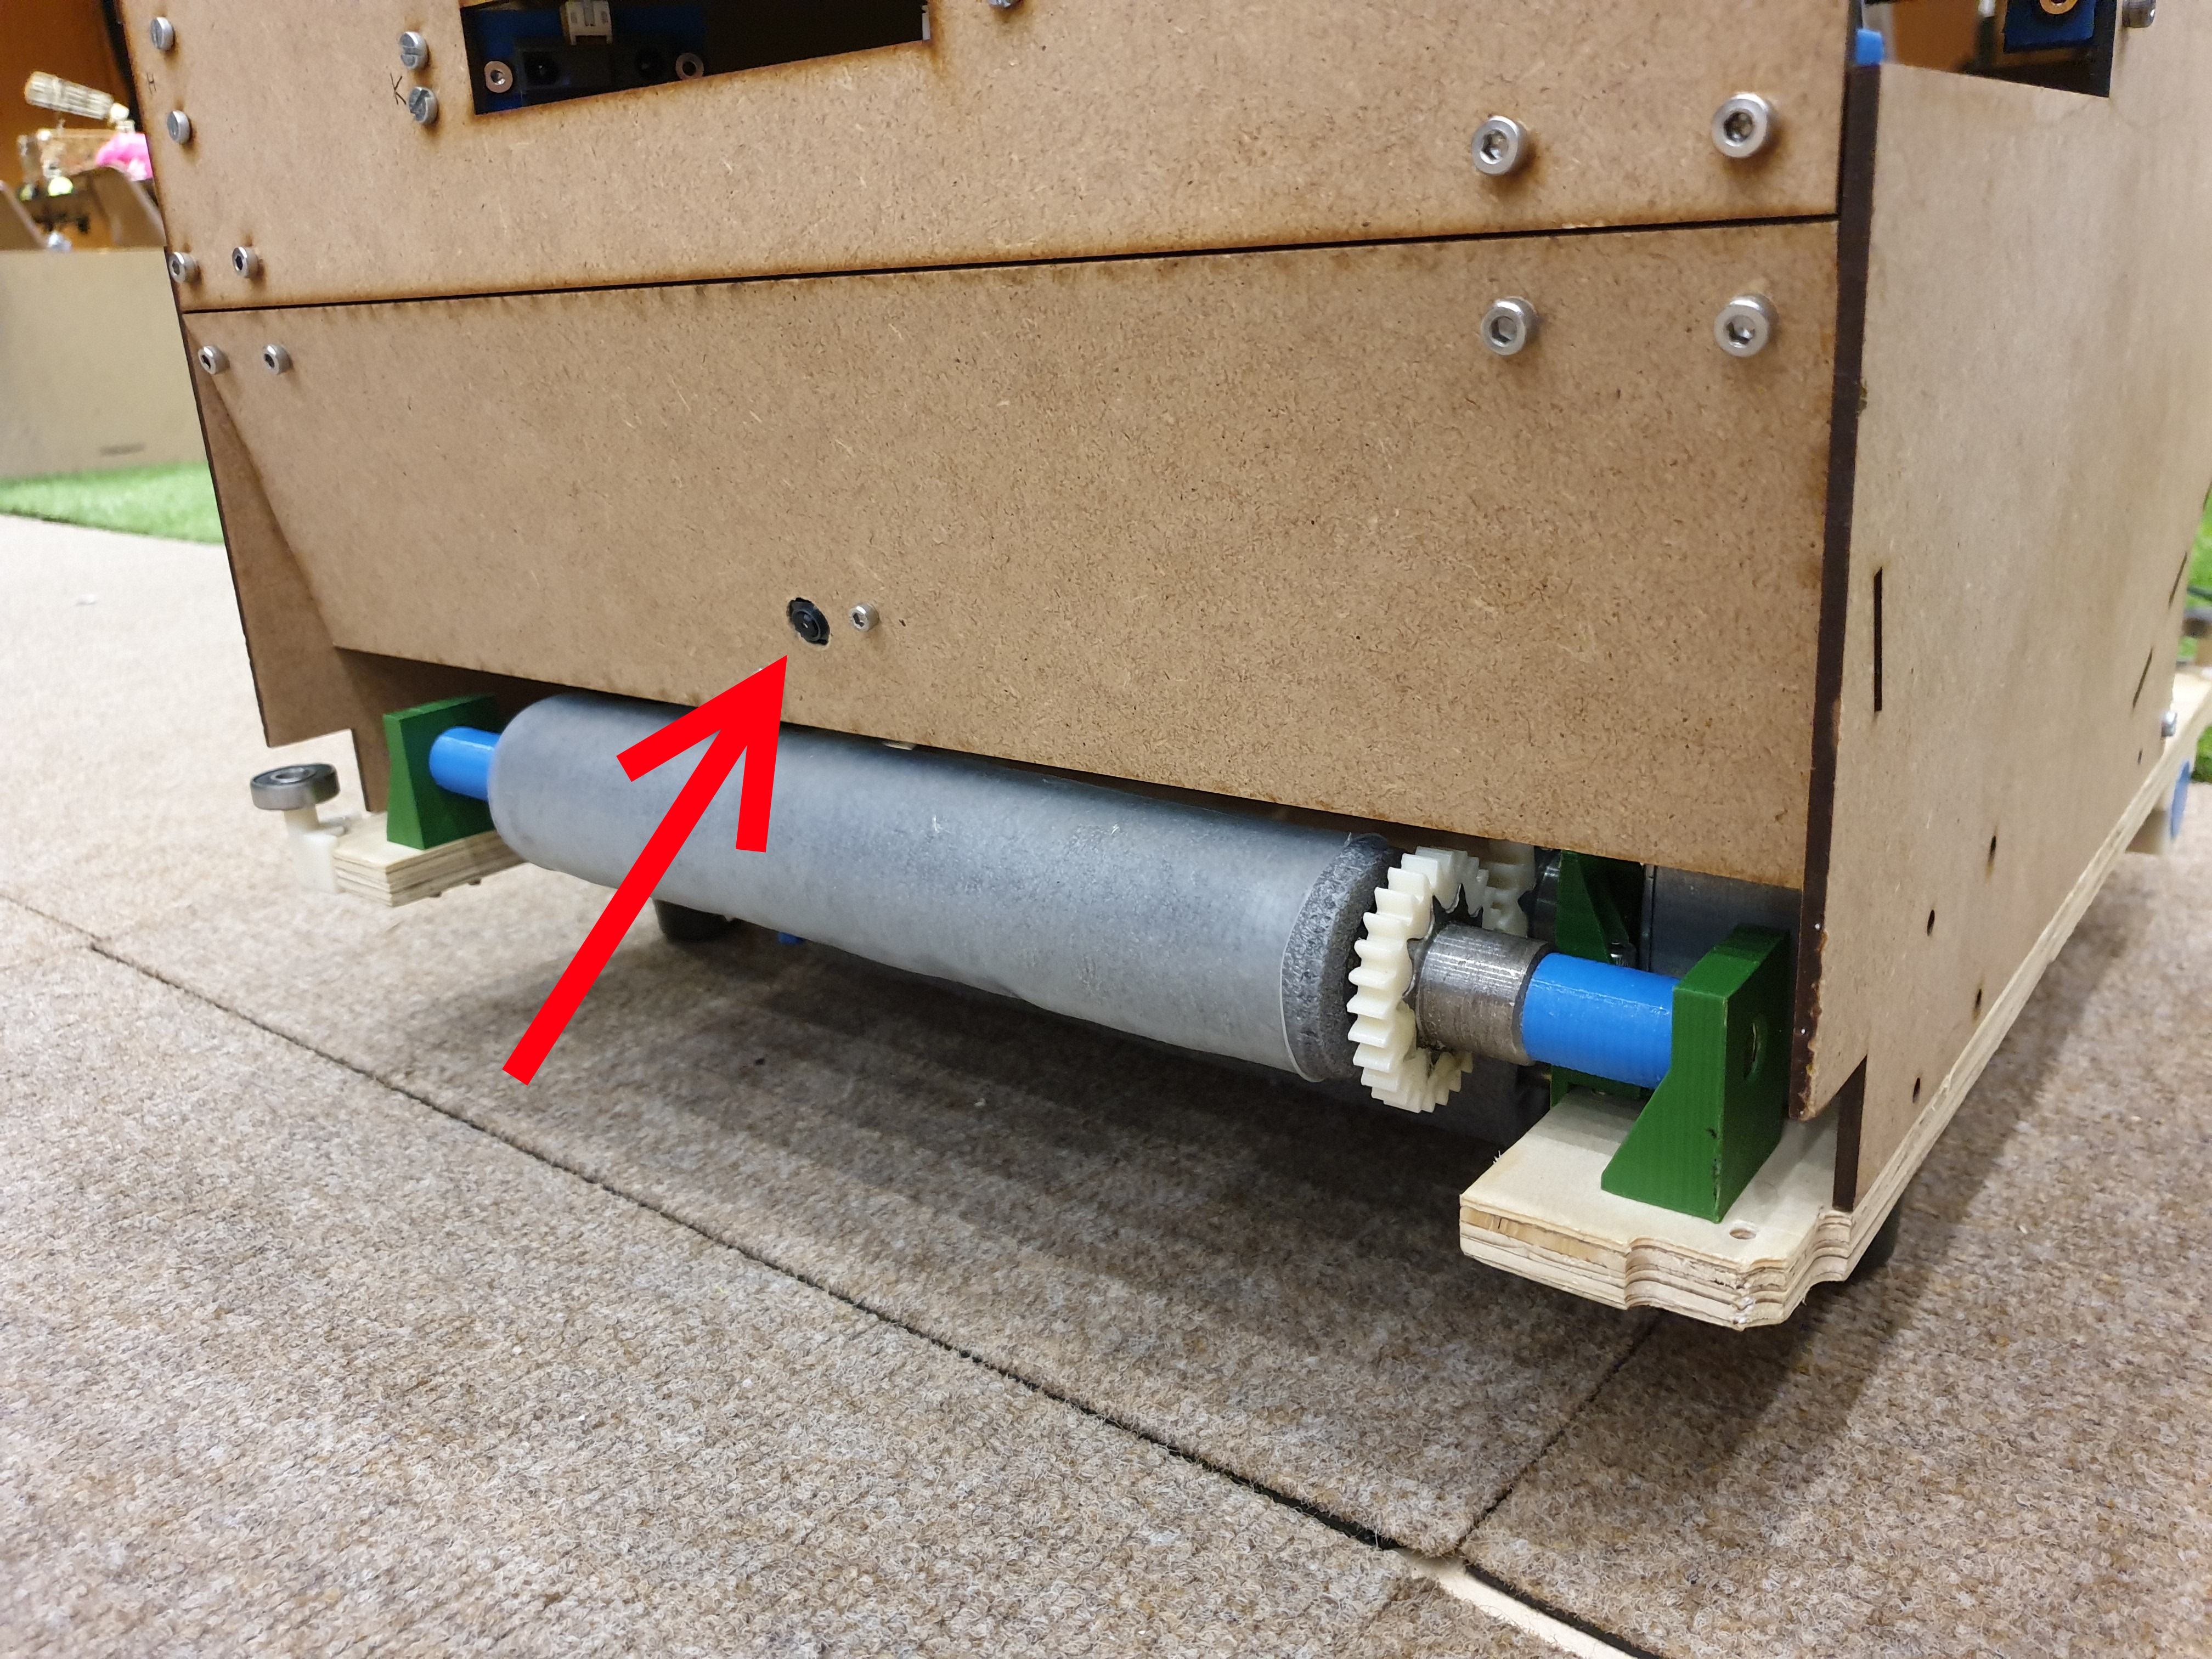
Thanks to this technique, we only see a little hole on the front of the robot:
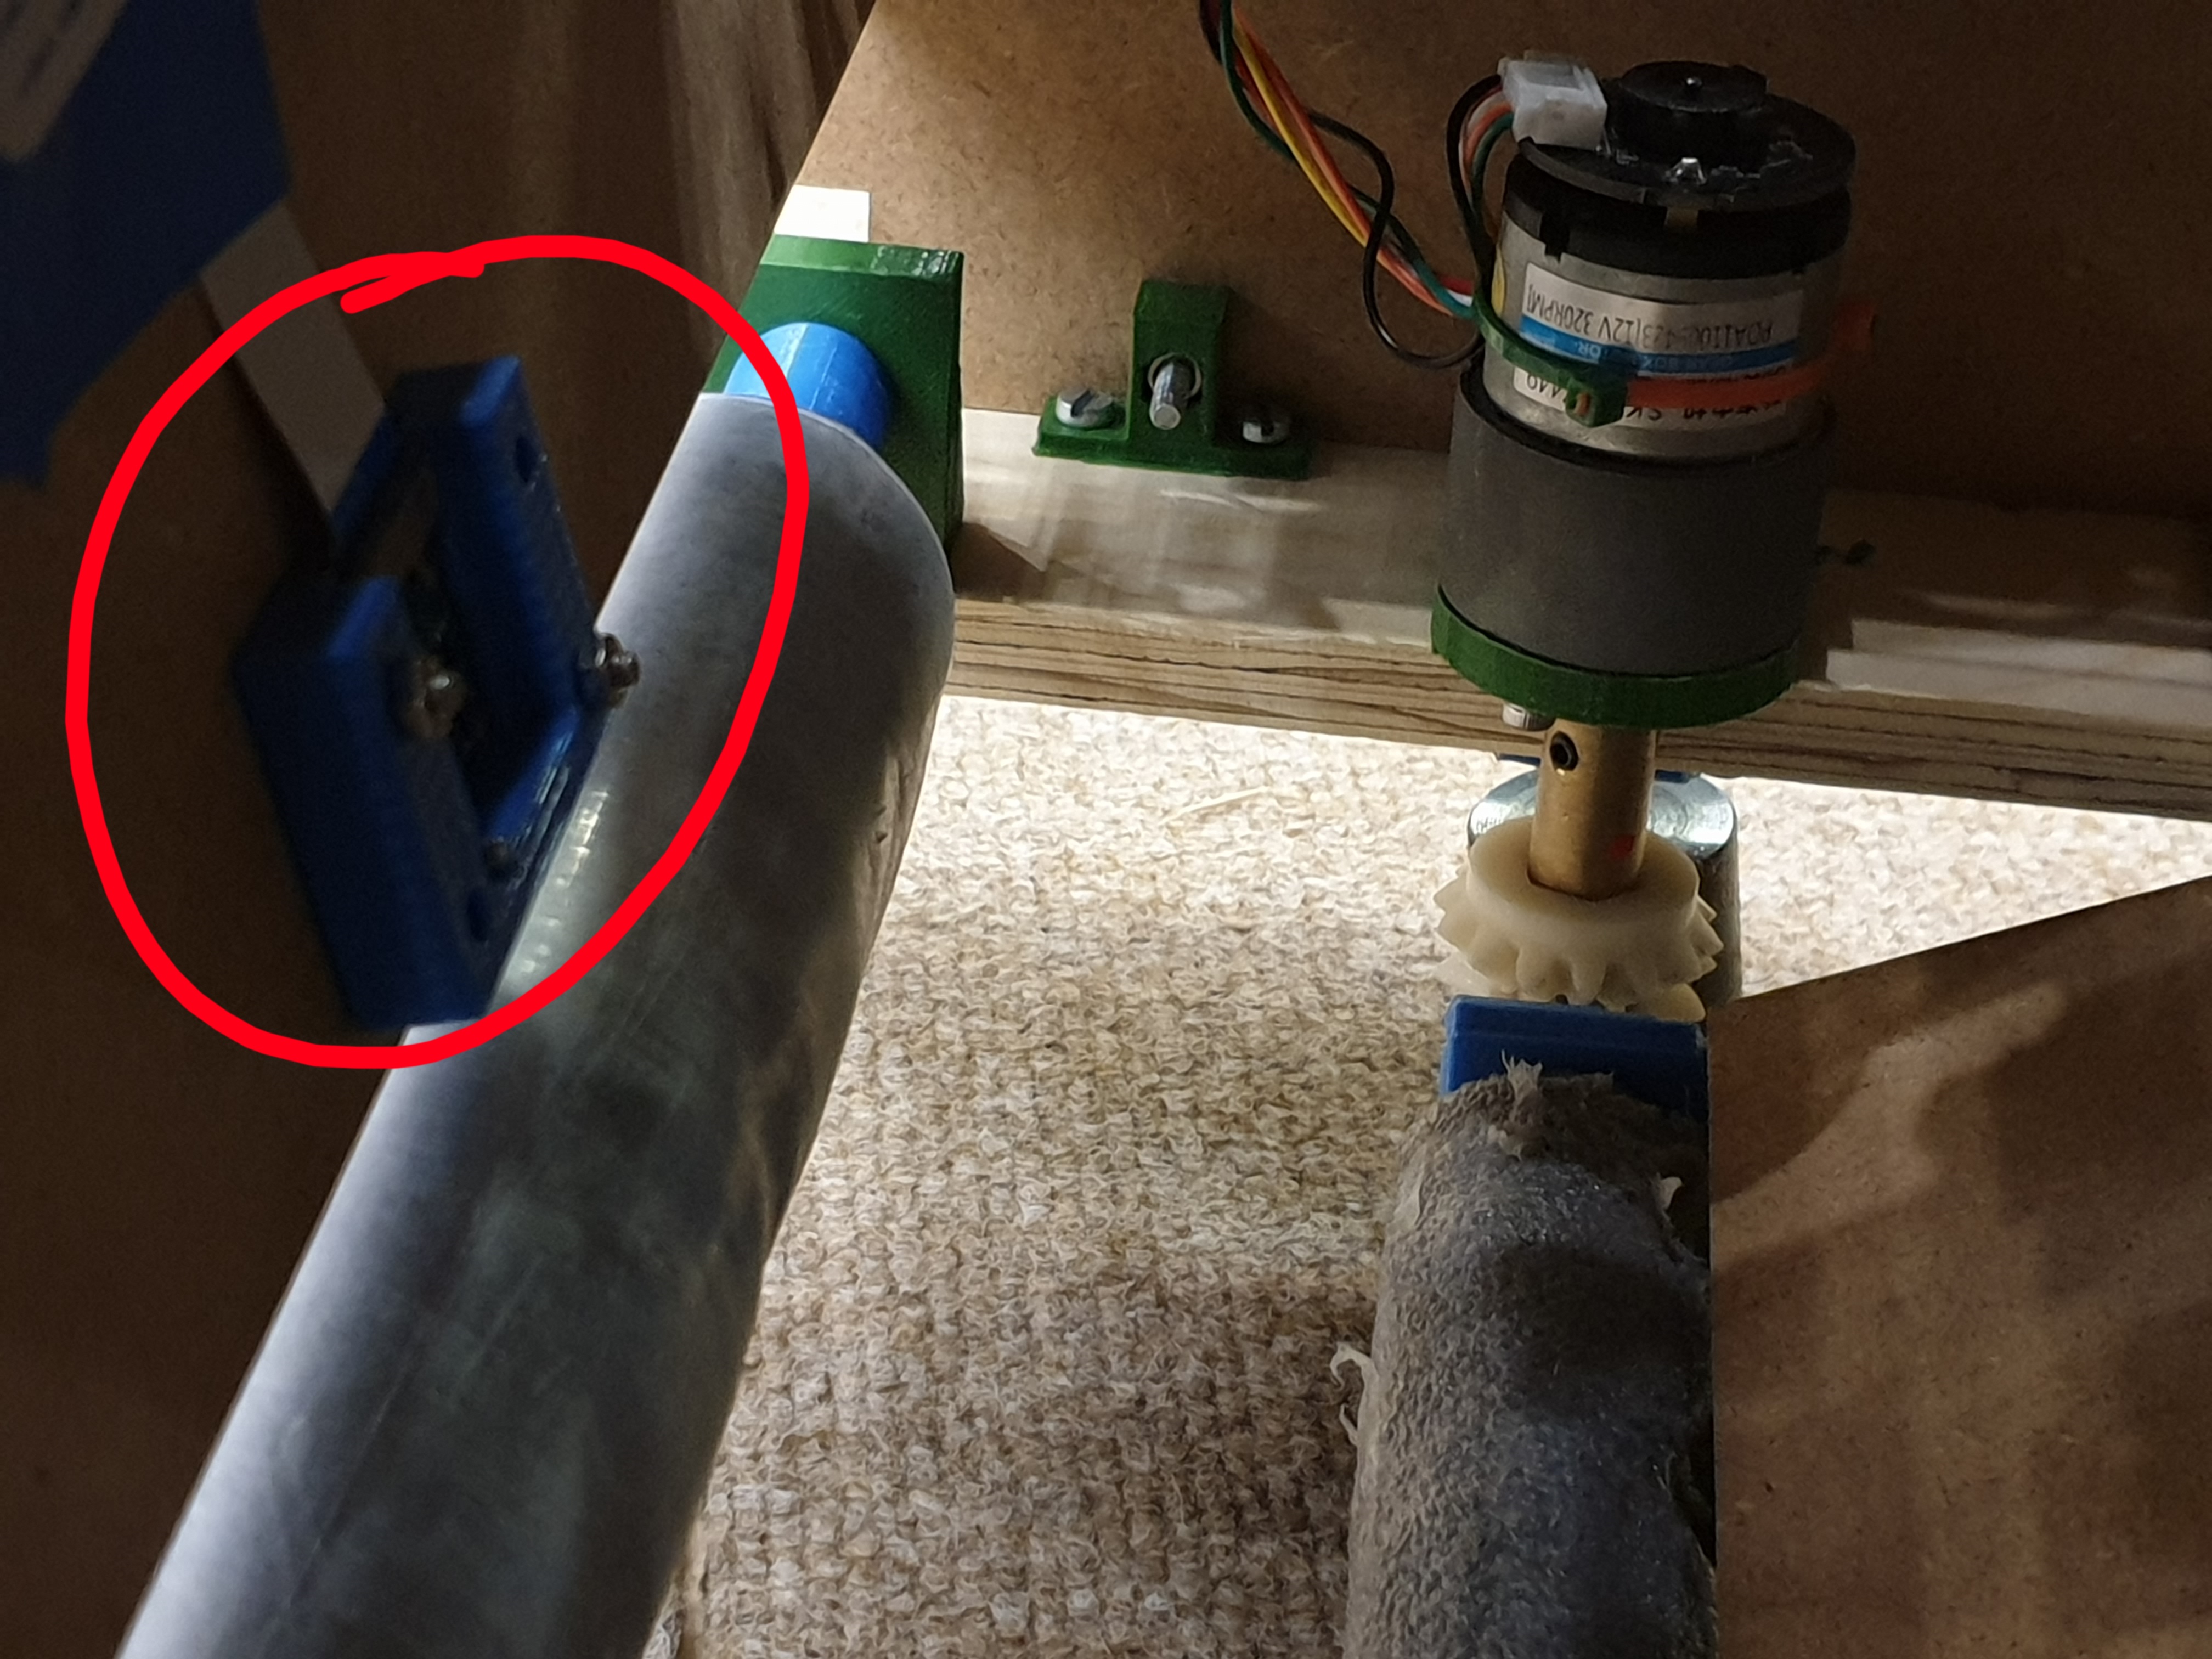
Here is the inside view. I made a 3D printed piece to attach the camera:
3- ImageAI lib
3.1- Setting up environment
First, download RetinaNet model to train our model to recognize things: https://imageai.readthedocs.io/en/latest/detection/
Then, import the appropriate library:
from imageai.Detection import ObjectDetection
3.2- How to train a model:
First the dataset needs to be found.
To recognize bottles, we must train a model on many bottle images. Thanks to the file we downloaded for the first step, we can achieve it:
from imageai.Detection import ObjectDetection
import os

execution_path = os.getcwd()

detector = ObjectDetection()
detector.setModelTypeAsRetinaNet()
detector.setModelPath( os.path.join(execution_path , "resnet50_coco_best_v2.0.1.h5"))
detector.loadModel()
custom_objects = detector.CustomObjects(bottle=True)
Here “bottle=True” means that we want to train our model on bottles. We could also put “car=True” to recognize cars. The training takes a few seconds, and the model is then ready to recognize bottles.
3.3- Run the trained model on a picture
The following line will run the model on a file called bottle.jpg:
detections = detector.detectCustomObjectsFromImage(input_image=os.path.join(execution_path , "bottle.jpg"), output_image_path=os.path.join(execution_path , "bottle_detection.png"), custom_objects=custom_objects, minimum_percentage_probability=65)
Here is the result on a simple image:


Indeed, we got 3 bottles with high confidence. With a more complex environment:


Despite the light, the model found the right bottle. Even though only half of the bottle is visible, the model has found the left one.
Each object can be accessed to display its properties such as percentage, name, etc:
for eachObject in detections:
    print(eachObject["name"] + " : " + eachObject["percentage_probability"] )
3.4- Real time recognition through a camera
First, we need to get the video from the camera. I choose to use OpenCV:
import cv2
import matplotlib.pyplot as plt
import matplotlib.image as mpimg

camera = cv2.VideoCapture(1)
while True:
   return_value,image = camera.read()
   gray = cv2.cvtColor(image,cv2.COLOR_BGR2GRAY)
   cv2.imshow('image',image)
   if cv2.waitKey(1)& 0xFF == ord('q'):
    break

camera.release()
cv2.destroyAllWindows()
With the above code, we display the video from our camera. Then we can process some filters like RGB to GRAY (to use the filter, replace the image with gray in cv2.imshow).
Then, we need to take screenshots to process our model on it:
camera = cv2.VideoCapture(1)
while True:
    return_value,image = camera.read()
    gray = cv2.cvtColor(image,cv2.COLOR_BGR2GRAY)
    cv2.imshow('image',image)
    if cv2.waitKey(1)& 0xFF == ord('s'):
        cv2.imwrite('cam_screenshot.jpg',image)
        detections = detector.detectCustomObjectsFromImage(input_image=os.path.join(execution_path , "cam_screenshot.jpg"), output_image_path=os.path.join(execution_path , "cam_bottle_detection.png"), custom_objects=custom_objects, minimum_percentage_probability=65)
        img_detection=mpimg.imread('cam_bottle_detection.png')
        cv2.imshow('cam_bottle_detection',img_detection)
    if cv2.waitKey(1)& 0xFF == ord('q'):
        break
camera.release()
cv2.destroyAllWindows()
With this code, we only need to press “s” on the keyboard to take a screenshot and then apply our model on it. Here a result:


The above method works well, but it is a slow process. It takes between 4 and 6s to detect the bottles. In the next part, we will see how to increase the detection speed.
3.5- How to optimize the detection process
First, we need to add a detection_speed parameter when we load the model. Indeed, imageai provides an option to increase the speed of its detection process. Nevertheless, its efficiency will be decreased.
detector.loadModel(detection_speed="fastest")
The possibilities are: fast, faster, fastest. I wanted here to test the fastest (the worst efficiency).
First, let’s test on the same picture (the normal speed vs the fastest):
Normal speed: ~6s:


Fastest speed: ~0.6s:

The process is 10 times faster but the probabilities decrease. This means that we can miss bottles in real time recognition. I was also able to achieve detections in 0.35s with low image quality.
3.6- Real time detection on video
Imageai also offers an object detection process on a video or live stream. We can also adjust the speed and efficiency of the detection, as we did for the detection process on images. Here is the code and a result:
execution_path = os.getcwd()

detector = VideoObjectDetection()
detector.setModelTypeAsRetinaNet()
detector.setModelPath( os.path.join(execution_path , "resnet50_coco_best_v2.0.1.h5"))
detector.loadModel(detection_speed="fastest")

video_path = detector.detectObjectsFromVideo(input_file_path=os.path.join(execution_path, "camera_recording.mp4"),
output_file_path=os.path.join(execution_path, "objects_detection")
,frames_per_second=20, log_progress=True)

print(video_path)
Unfortunately, running a script on the robot’s Raspberry PI board is 10 times slower than on my computer. I went from 0.35s to ~3s which is not usable.
4. OpenCV
For this solution, I did a color filter to get only the bright spot. As is not a complex code, I won’t post the details. Only the result:
It worked well with good light, which is not always the case. I chose to use a circular LED to have a good light in any circumstance:
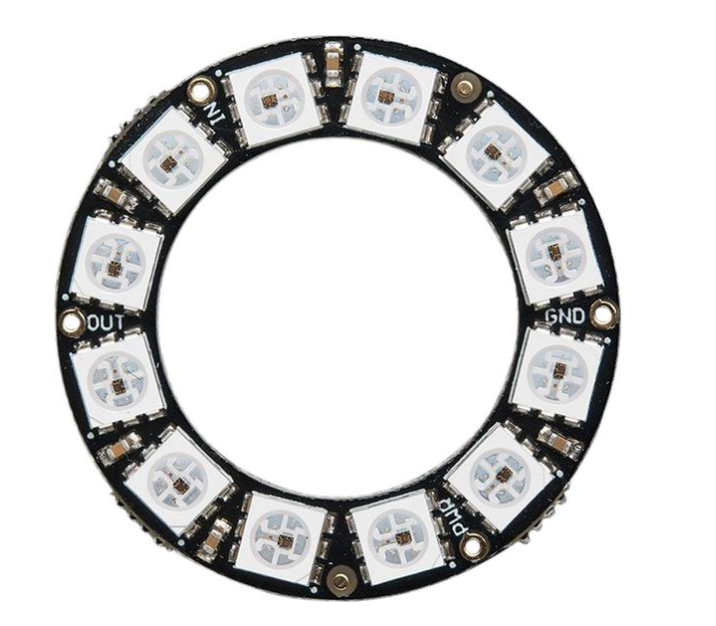
I then filter with the color of the LED, green, and decrease the shutter speed of the camera:
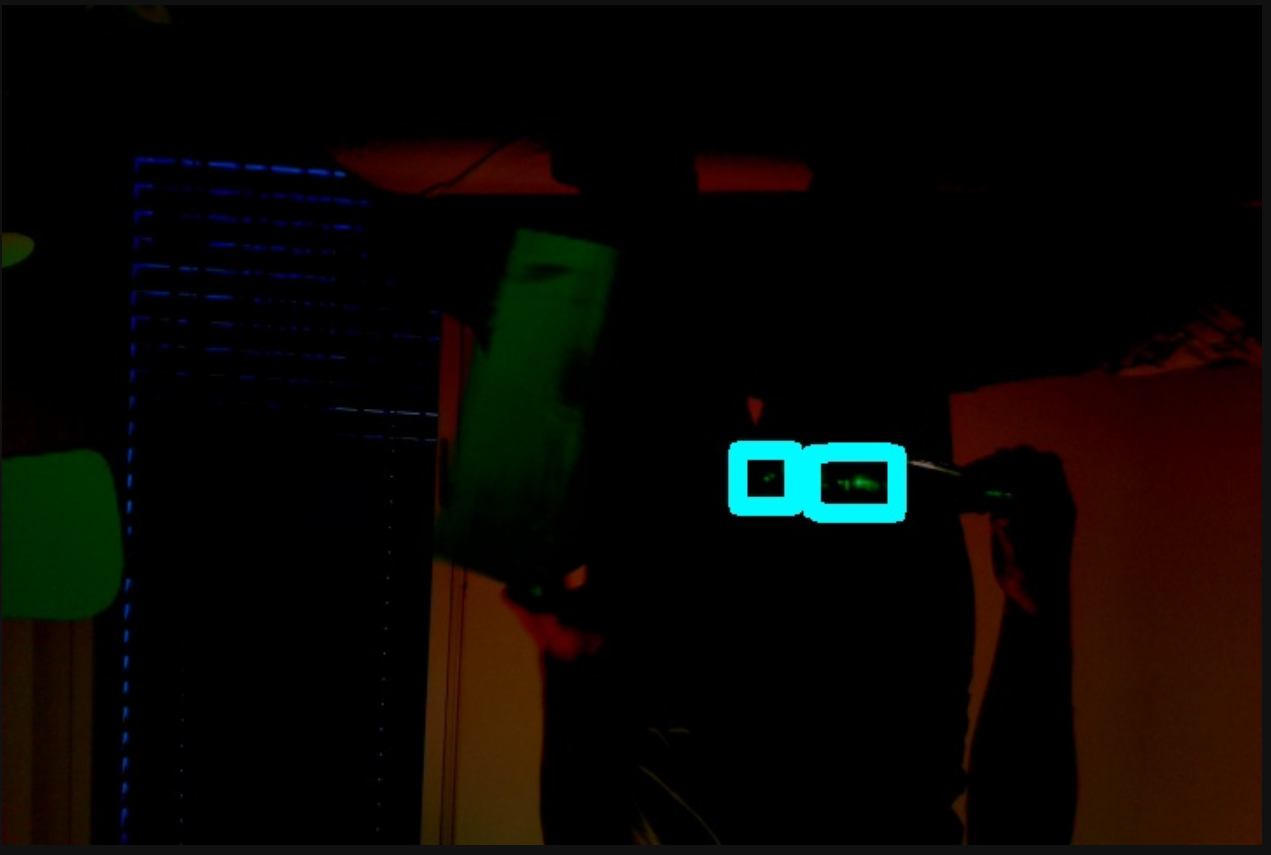
Since few objects have reflective properties in the arena where the robot will operate, this may work well. Unfortunately, with this technique, I only know the direction the robot must go to reach the bottle. I can’t know the distance.
5- Haar Cascade
I chose to go with a Haar Cascade solution. This is a machine learning based approach where a cascade function is trained from a large number of positive and negative images. It provides fast detection, and since I’m running it on a Raspberry PI board, I really need it!
There are many possibilities to train a Haar Cascaded model but the main point is to get the data set. I obtained this by recording a video through the camera I put on the robot. I did it once without a bottle, I stored several captures of this stream in my negative image folder (negative means that the object I want to detect is not in these images). Then I put several bottles around the robot and took my positive images.
5.1 How to get the position of the bottle?
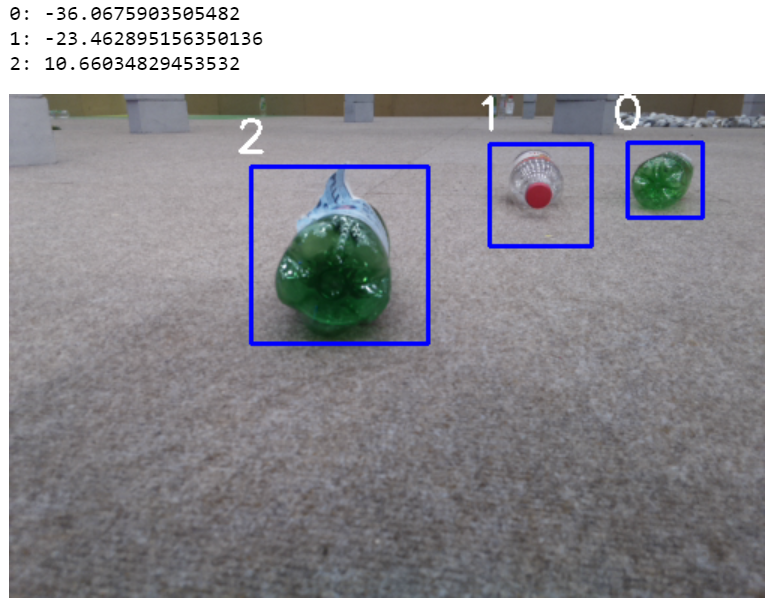
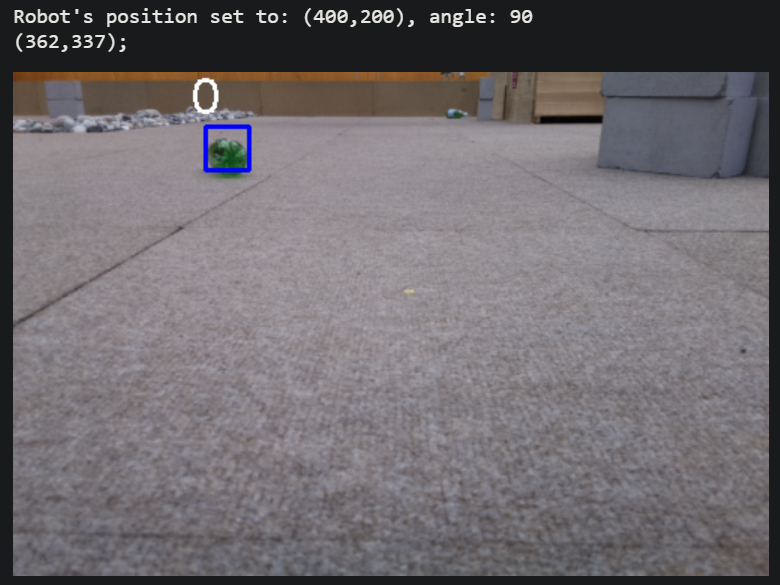
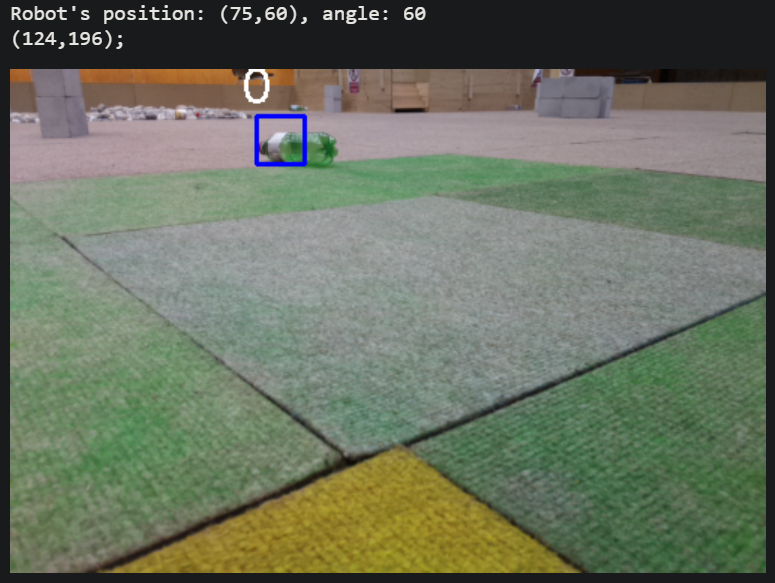
The first objective was to find the angle between the robot and the bottle. To find this angle, I draw a vertical line in the middle of the image with OpenCV, which divides the image in two. This line represents the reference for 0°, any bottle on the left of this line would have a negative angle, those on the right would have a positive angle from the robot’s point of view. I then save the pixel coordinates of the middle of the bottom line of the rectangle drawn by the result of Haar Cascade. I draw a line to count the bottom pixel of the reference line and the saved pixel of the bottle rectangle. Finally, I calculate the angle between these two lines.
I show my results in the following figures:

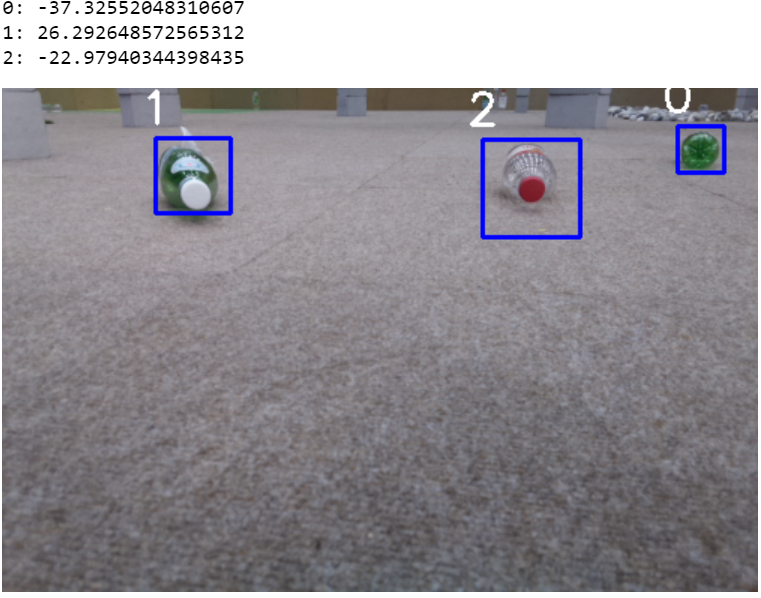
Here some tests I did:
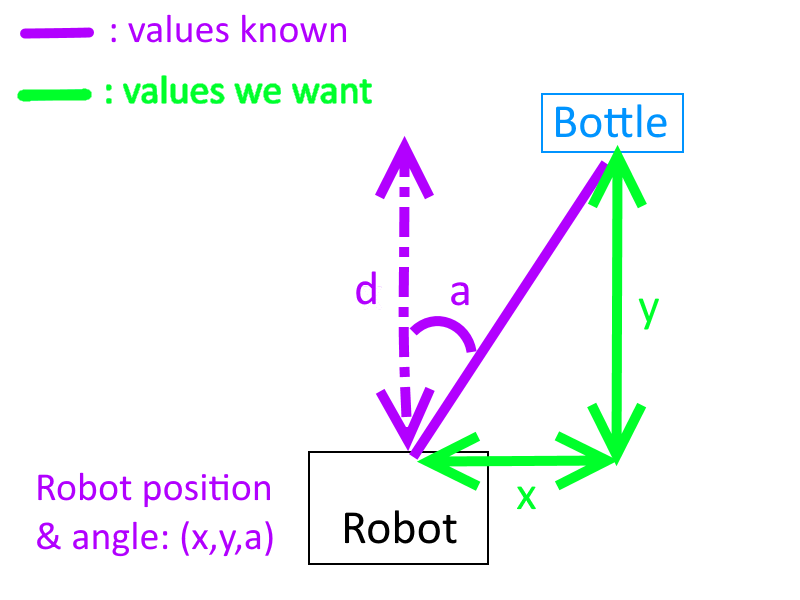
Then, I had to find the position of the bottle on the arena. For that, I get the position and the angle of the robot from the microcontroller which knows this information thanks to our encoding wheels. The only remaining information is the distance. As the camera is a bit towards the ground, there is a simple relation between the height of the pixel and the distance; for example:
If pixel 0 starts at the bottom of the image, 100 pixels above could be 30 cm in the real world, 400 could be 3 meters, etc. Then I just had to find the formula on an Excel-type calculator.
The problem was:
5.2 Results
I displayed the robot’s position and angle, then the absolute position of the bottles in the order of the numbers:

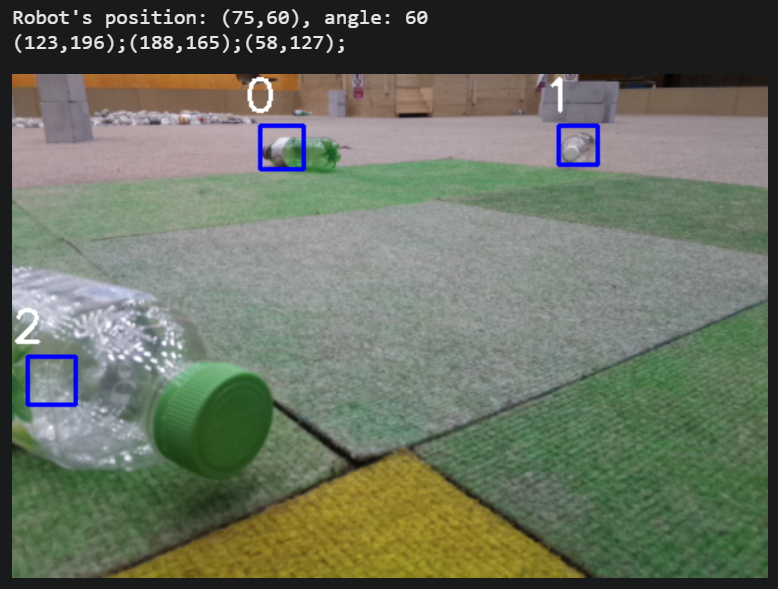
The position error went from 2cm to 15cm maximum in the worst case. As the front of the robot (where the bottle enters) is 40cm wide, it will catch all the bottles!
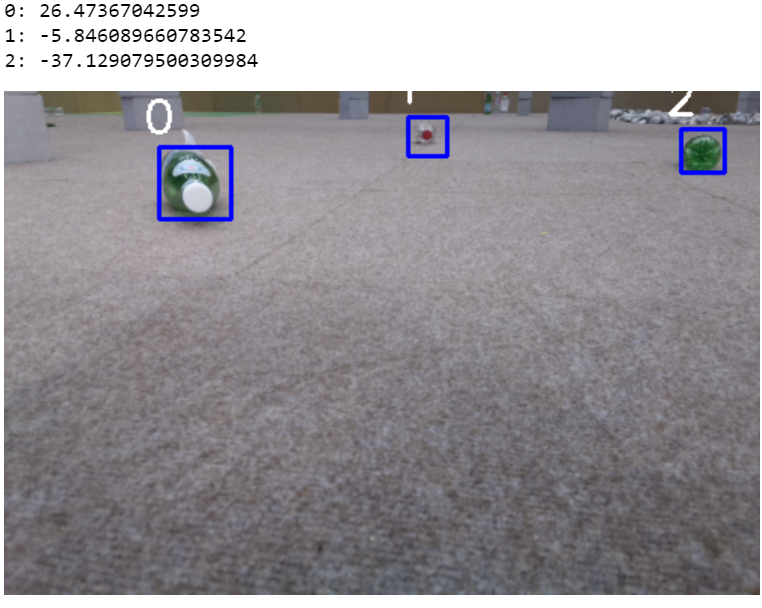
Here are the results of the Haar Cascade for bottles with different positions and orientations:
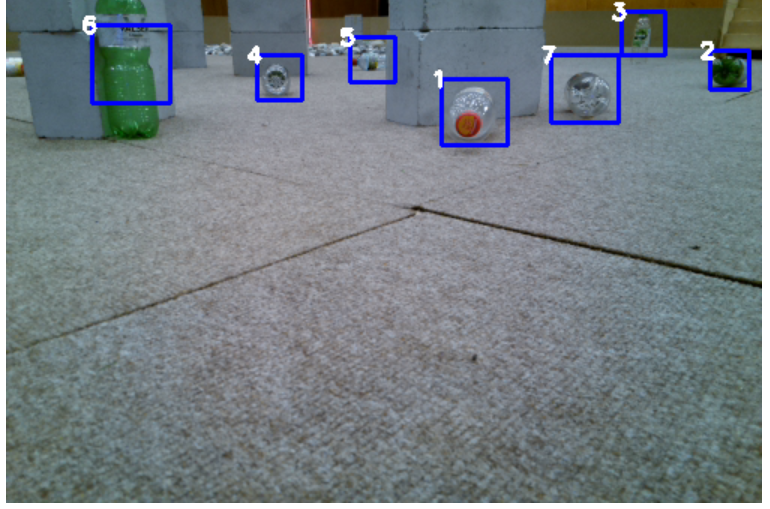
Here on a blurred image:
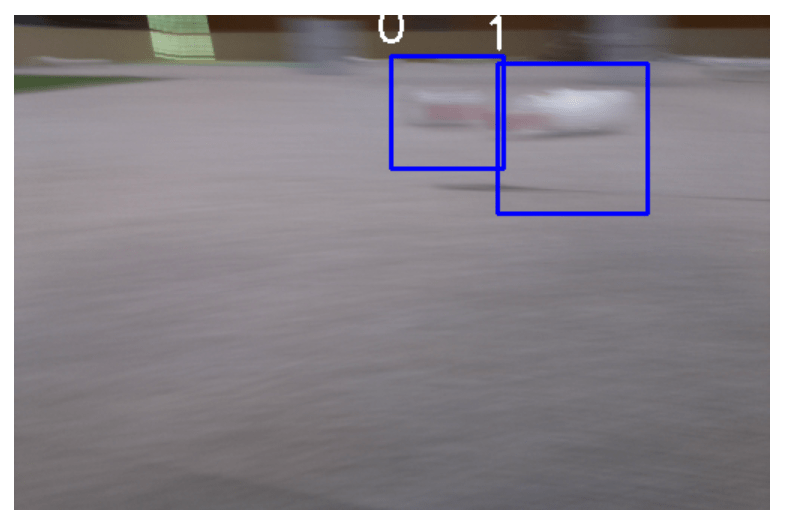
I did not expect such results when I developed the Haar cascade detection.
Here you can find my project:
https://github.com/Apiquet/opencv_visual_recognition
